|
|
|
Please enter your name and email address to obtain your mail settings:
Checking account settings on Outlook 2013.
|
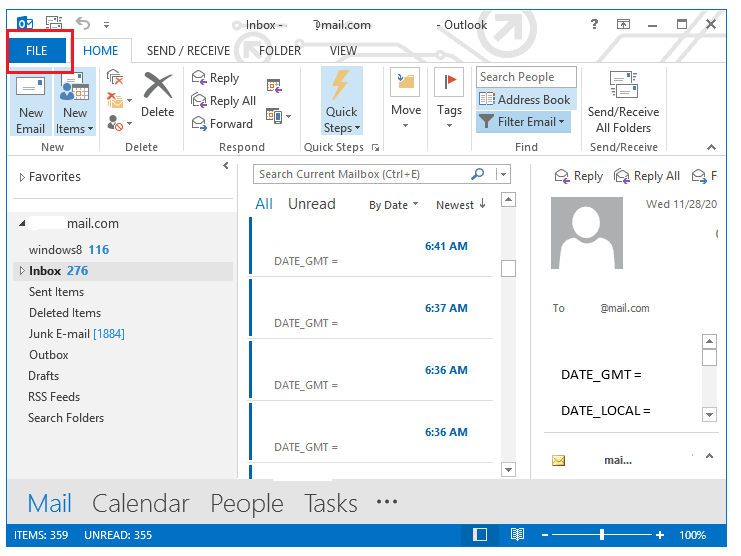
First you would click "file" on the top left.
|
|
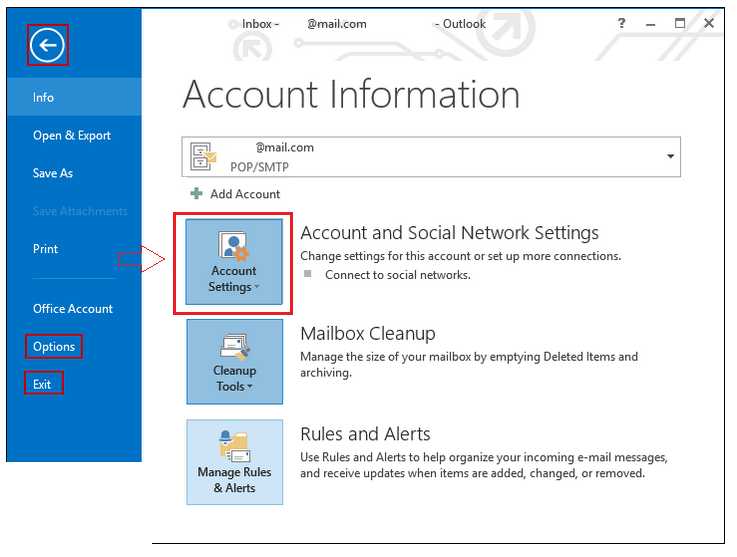
Now hit the "account settings" box around the center of the screen.
|
|
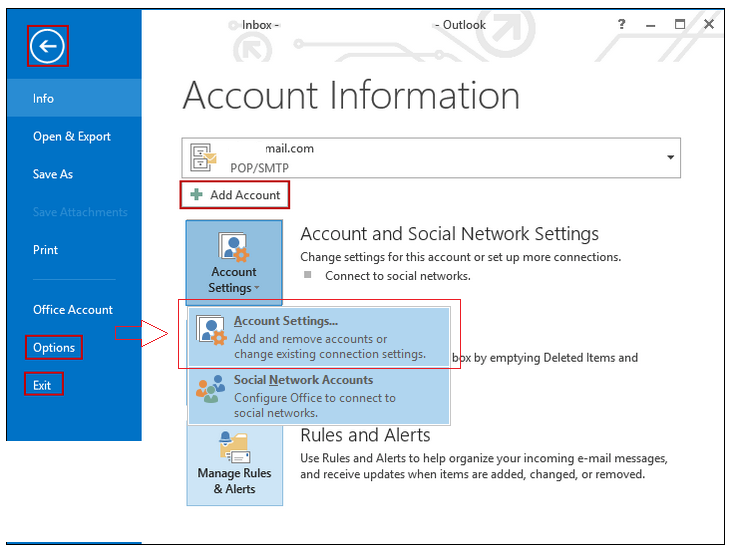
That should bring up this drop down of sorts. The option you want is the "Account Settings..." one. Click that.
|
|
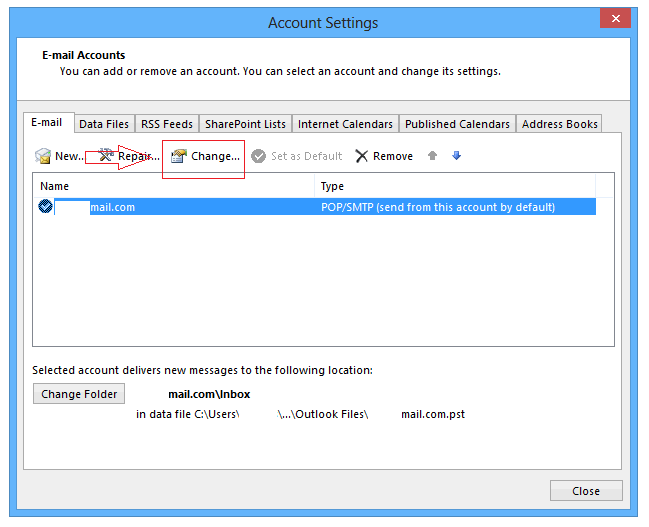
This brings up the list of all accounts created on your computer. You may see more than one account here and that is, in most cases, normal although feel free to delete any accounts that you know you are not using. Highlight the account for which you wish to change settings and then hit the "change" button on the top.
|
|
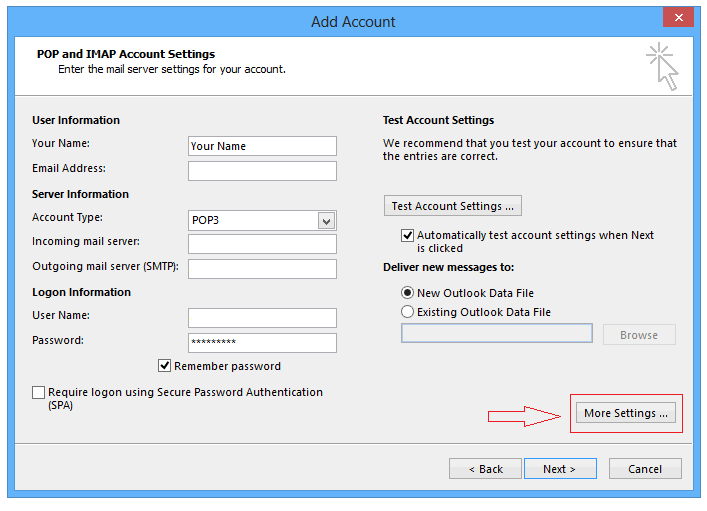
This is your main account settings screen. You'll want to be sure the incoming and outgoing server are set to mail.domain.tld, which domain.tld replaced with your actual domain, and the username should be your full email address with the "@" and the domain at the end. If all these are correct then hit "More Settings".
|
|
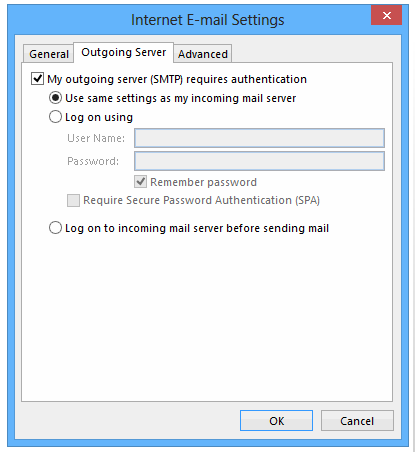
On this pop-up you're interested in the last two tabs. First, on the Outgoing Server tab, be sure "my server requires authentication" is checked and that it is set to use the same username and password as your incoming mail server.
|
|
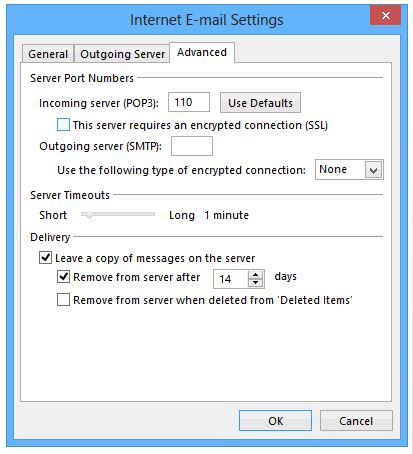
And finally, under Advanced, be sure the port for Outgoing Server SMTP is 1025. Incoming server can stay as default, so 110 for POP and 143 for IMAP. Hit OK, Next and Finish and you should now have a fully functional email account.
|
© 2026