Open Mozilla Thunderbird.
Click on the 'Tools' menu and then click 'Account Settings...'.
|
|
|
Please enter your name and email address to obtain your mail settings:
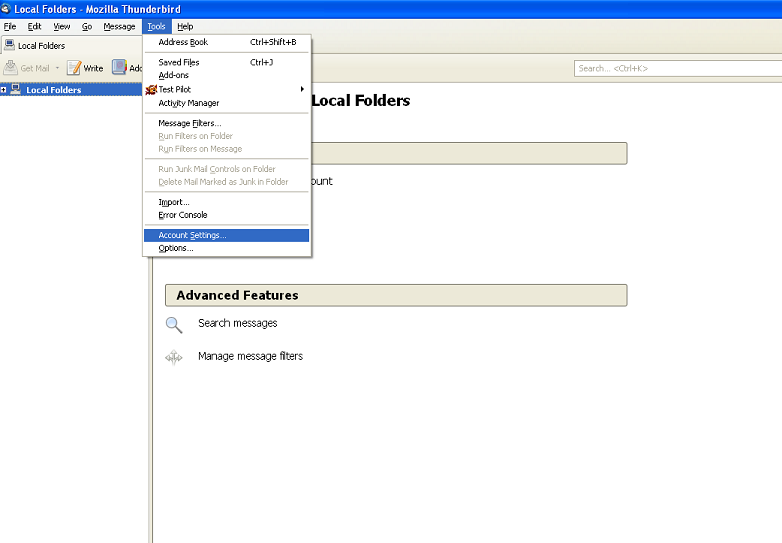 |
Open Mozilla Thunderbird. Click on the 'Tools' menu and then click 'Account Settings...'. |
|
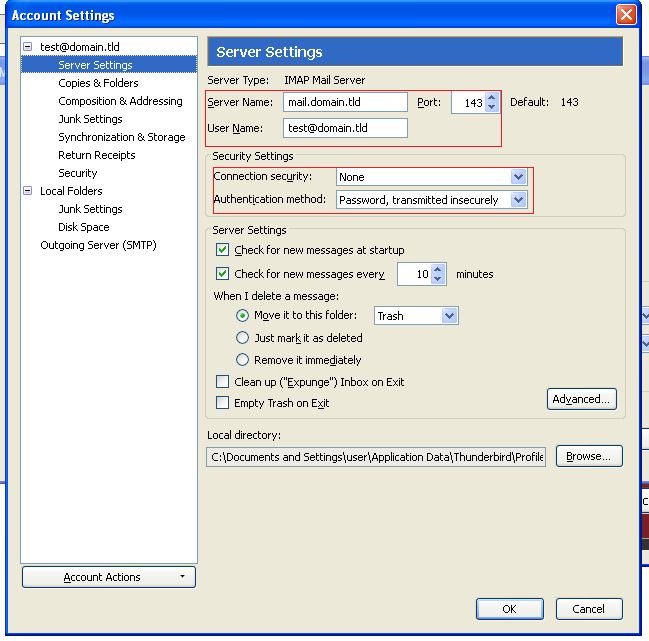
This will bring up the Account Settings window. From here find the account you are looking to edit on the left and click "server settings" under it. Here you will want your: Replace with: mail.your_website_address.com And your: Replace with: your_email.your_website_address.com Make sure the port is set to the default, 143 for IMAP and 110 for POP, the Connection Security is set to None and the Authentication Method is set to Password, transmitted insecurely |
|
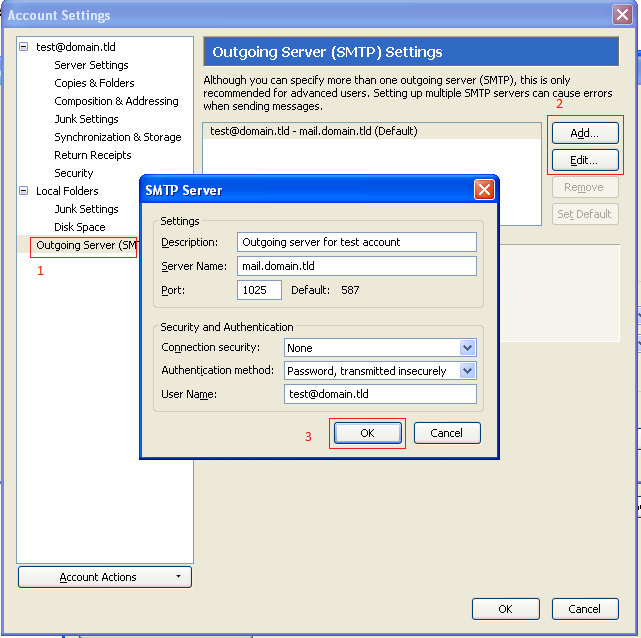
Then go to "Outgoing Server" on the left. You should see an account for the email with which you are working. If it doesn't already say "Default" next to it then highlight it an hit "Set Default". You may want to delete any outgoing servers on here that are no longer in use. If you only check one email address with this mail client you will probably only want to see one entry on this list. The following are the most important: The server name here is the same as the incoming, so: Replace with: mail.your_website_address.com And your: Replace with: your_email.your_website_address.com The port should be 1025 and the other settings are much like the incoming server as well. So Connection Security is None and Authentication Method is Password, transmitted insecurely. Put something in the description to name this outgoing server. It's a good idea to label this with the name of the person or company that will be sending with this account. Hit "OK" on this window and "OK" on the Account Settings window and you can retest the, ideally, working connection. |
© 2026